Posts

Hot Dogs—Our Thoughts On What’s Best and Why

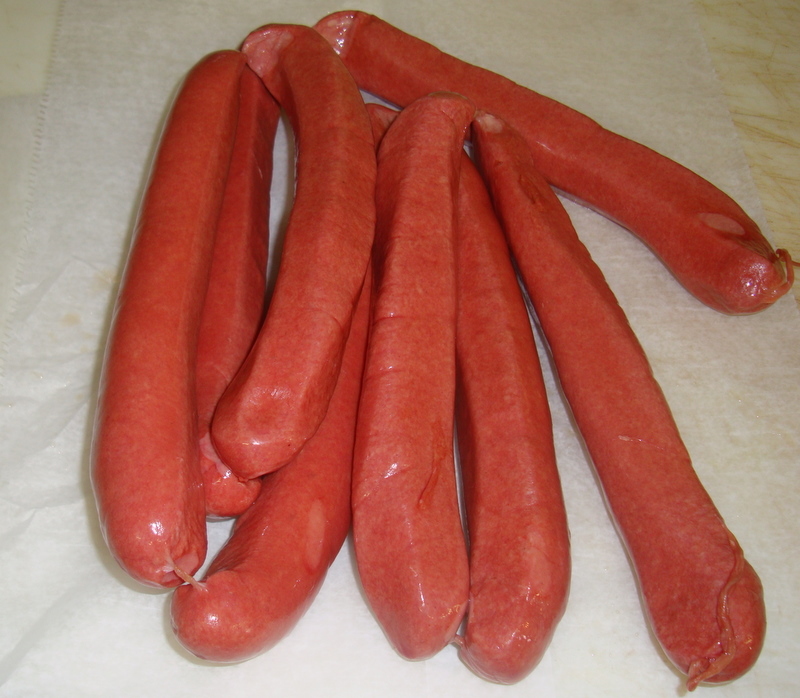
People have a lot of opinions about what constitutes a really good hot dog.  And at Mister Brisket, we’re no different. But here’s the thing–Mister Brisket is not just a Butcher Shop. We’re also a research institute. If we sell a product, it’s because through trial and error (hopefully not too much error) we feel it’s the best one available. Over the years we’ve sampled many hot dogs.  Best Kosher…Hebrew National….Sabretts….just to name a few. We’ve experimented with shapes and sizes. And we’ve tried them in various forms.  Two things are apparent to us. First, the best hot dogs are all beef. Specifically, they’re made from bull meat which is chopped, seasoned and then cured. Secondly, texture is as important as flavor.

In our experience, the best hot dog is an all beef Chicago Style dog in a sheep casing. The flavor is outstanding–not too highly seasoned or garlicky or somehow mucked up with gimmicky flavor enhancements. And the sheep casing provides a wonderful texture. You get a snap and a crack when you bite into a quality beef hot dog in a sheep casing. Larger dogs in hog casing will be more chewy. And skinless dogs, which are very popular in Cleveland, lack the firmness of a natural casing dog. The picture above shows exactly what we sell.  It is a fabulous dog and comes six to a pound.

Three Mister Brisket Natural Casing Hot Dogs grilled in shop on a bun with deli mustard (Batampte), sauerkraut and swiss cheese. Yes, we sell this at our shop!

The next issue with hot dogs is method of preparation. Sentiment often plays a big role. Some people enjoy them steamed because of memories from old Cleveland Stadium. Others boil them because that’s what Mom did. Some will put their hot dogs on a stick and hold them over a fire in order to relive camping adventures.  Ultimately, however, you gotta grill the dog. The reason? Texture. The natural casing dog on a hot grill will slowly expand then fissures will develop where the casing cracks. The picture above gives you a look at your model citizen. Consistent grill marks and cracks in the casing show that these are perfect for consumption. As to what to put on the dog, well, that’s up to you. Purists insist solely on mustard but if you like ketchup as well, it’s your prerogative.

Hot Dogs are often thought of as a summer item but true aficionados enjoy them year round. If you like hot dogs, Mister Brisket wants you to give ours a shot. In addition, to the ones in natural casing, we’ll get you skinless by request. Or, if you want, we carry a jumbo version of the same dog that comes two to a pound (aka Frankenwurst). We have a dog for all styles. Just tell us which one, and we’ll have it for you.  Please note–Mister Brisket Natural Casing Hot Dogs are a special order item. If you want a large quantity, give us several days notice so we can make sure to have them in stock.

Classic Beef Stew

(Feeds 6)

Ingredients

  • 2-2 1/2 lbs beef chuck chunks
  • 2 tbsp olive oil, 1clove crushed garlic
  • 1 tbsp minced garlic, 3 large onions cut up
  • 3 tbsp flour
  • 2 cups beef stock
  • 1 cup red wine
  • 1 bay leaf
  • 1 tsp fresh thyme leaves (sub dried thyme if needed)
  • 5 large potatoes–peel and cut into chunks
  • 5 large carrots cut up
  • 1 cup frozen peas
  • Salt and pepper to taste

Directions

Heat a large deep skillet for which you have a cover at med. high…add the oil and crushed garlic clove then stir for 1 minute…remove and discard the garlic…add the beef chunks a few at a time. Turn them so they brown on both sides. Keep adding…Season the beef with salt and pepper as it cooks…remove the beef with a slotted spoon when it is browned. Spoon out the fat from the pan as best as possible…Turn down the heat to medium. Add the onions, stirring, until they soften…Add the flour and cook, stirring, for another couple minutes…Add the beef stock, wine, thyme, bay leaf and the beef chunks. Turn down the heat to low and cover. Let it cook for 30 minutes…Uncover the pan. The mixture should be soupy. Add the carrots, potatoes and turn up the heat to bring it back to a boil. Now turn it back down and cover. Leave alone for at least a half hour. At this point see if the beef and veggies are tender. Cook until they are. Add more salt and pepper during this process if necessary…Add the minced garlic and peas. If the stew is too soupy, remove the cover and turn up the heat until some of the excess liquid has boiled off. If the consistency is good, let sit covered until the peas are heated. When peas are finished, serve and enjoy.

If you want to make the stew but not serve it right away, remove the beef and vegetables from the liquid. Place the beef and veggies in one container and the liquid in another. When ready to serve, place back in the skillet, cover and heat.

Classic Mister Brisket Brisket Recipe

(Serves 8-10)

Utensils:

  • A large old-fashioned roasting pan – the blue one with the white speckles. Speckled roasters are usually available in most hardware stores. Be sure to buy the size that holds a 20-22 pound turkey – the label on the pan should spell out its capacity. Unfortunately, I have not convinced the roasting pan manufacturers to think of briskets; they think in terms of turkeys. But if it’s big enough for a 22-pound turkey, it’ll be big enough for a 6-10 pound brisket.
  • A medium-size mixing bowl
  • A large plastic container with a lid

Ingredients:

  • One First Cut Mister Brisket Beef Brisket–typically weighing from 5-8 lbs
  • 1 bottle Heinz Chili Sauce
  • 1 envelope Lipton’s Onion Soup Mix
  • 2 (12 ounce) can cola – don’t use diet cola

Directions:

  1. Preheat your oven to 325 degrees.
  2. Place the brisket fat-side-up into the roaster. (The brisket can be taken right from the refrigerator and put into the roaster – it does not have to be at room temperature.)
  3. Pour the chili sauce, onion soup mix and the cola into the mixing bowl and stir several times. (Many people are tempted to taste this concoction. Trust me, it tastes “challucious.” You’ll taste it after the brisket is cooked.)
  4. Dump this mixture over the brisket. You can lift the brisket up and let some of the liquid spread under it. It won’t hurt.
  5. Cover the brisket and roast it at 325 degrees until the flat portion is fork tender — anywhere from 3 to 3-1/2 hours. By “fork tender” I mean that the meat is tender, but there is still a slight tug on the fork as you pull the fork out of the brisket. If it is not fork tender, cover the brisket and return it to the oven, checking at 15-minute intervals.
  6. When the flat section is done (fork tender), remove the brisket from the roaster and allow it to cool on a platter. When the gravy is cooled, pour it into the plastic container, cover and refrigerate it. Wrap the cooled brisket in cellophane and place it into the refrigerator overnight. Once it’s refrigerated, the roasted brisket and cold gravy can remain there for at least a week before it’s sliced, reheated and served.

Slicing, reheating and serving:

The easiest thing to do is to bring the cold, roasted brisket (please leave the gravy at home) to the store and we will defat, slice and aesthetically replace it in your roasting pan. If you’re too busy with work, car-pooling, tennis lessons, lunches, aerobics classes, power lifting or feel that Taylor Road is impossible for your schedule, you’re going to have to slice it yourself.

Here’s what to do:

  1. Get a real sharp knife and trim off all visible fat from the top of the brisket. Do this on a cutting board.
  2. Turn the brisket over on what was the fat side. You should be looking at the muscle grain of the brisket. Take your knife and slice the brisket against or across the muscle grain. If the slices appear stringy, stop! You’re slicing the wrong way.
  3. Preheat the oven to 350 degrees and remove the cold gravy from the refrigerator. You’ll notice that all of the fat has congealed at the top. Remove the fat and throw it away.
  4. Heat the gravy in a saucepan until it boils.
  5. Pour this hot gravy over the brisket slices, cover the roaster and reheat your brisket for one hour at 350 degrees.

Beef Tenderloin for Roasting Recipe

A little anatomy

The tenderloin is the psoas muscle (pronounced ‘so-as’) located in the back, close to the shoulder and extending down to the hip of the steer. It does not get too much play or movement, and because of that it is considered the most tender and delicate portion of beef. Tenderloin weighs anywhere from 5-7 pounds and is covered with a fibrous connective tissue called “silver skin.” It also has a large, sinewy muscle attached to the side called the side strap or “chain.”

Freezing and defrosting

We wrap a beef tenderloin in cellophane, then waxed freezer paper. This package can be stored in the freezer for 3 months. You will also notice that there are a couple of packages marked “ground meat” that come with the tenderloin. Don’t worry, this is not a mistake. These are merely the trimmings that have been ground and freezer wrapped. They can be frozen for 6 months and used for burgers, chili or the best meatloaf you’ve ever tasted.

To defrost the beef tenderloin, remove the white waxed freezer paper, and place the now cellophane-wrapped tenderloin on a plate in the refrigerator. Allow 48 hours to defrost. Follow the same defrosting procedure for the ground meat packages.

Tenderloin for Roasting Recipe

(Serves 8 adults)

Ingredients

  • 1 whole beef tenderloin – we have tucked the tail (the tapered end of the club) and tied it to the lower third of the tenderloin. We also secure the other end of the tenderloin with string so that it won’t flop around. These two steps are done to allow for uniform cooking.
  • 1/4 cup olive oil
  • Salt, pepper, garlic powder, paprika–your favorite spices

Utensils

A cookie sheet or broiler pan

Directions

  1. Preheat the oven to 475 degrees.
  2. Rub the quarter cup of oil all over the tenderloin.
  3. Season the tenderloin as you wish with salt, pepper, garlic powder, paprika, etc…
  4. Place the tenderloin on the cookie sheet or broiler pan and bake it uncovered for 25- 30 minutes at 475 degrees.
  5. Turn on your kitchen fan if you have one, and remove the batteries from your smoke alarm if it’s nearby. High temperature cooking will cause smoke.
  6. Remove the tenderloin from the oven, when it has reached an internal temperature of 125 degrees (med. rare). Place it on a platter, and allow it to stand at room temperature for 10 minutes. Don’t worry, the tenderloin will not be cold – the carry over heat will continue to roast it. This particular technique allows for a medium-rare (pink) piece of meat, ready to eat.

Slicing

After the tenderloin has rested, remove any string that has been used to tuck or tie the tail and/or hold the butt end together. Get a sharp knife and cut the tenderloin into the appropriate number of portions. If anyone wants their meat more well-done, simply turn on the broiler and broil their portion one minute on each side. After you cut, you’ll probably notice an accumulation of juices that have seeped out. This is a delicious au jus should you want to pour it on the individual slices.